
This week I will show you how to feather or soften the edges of a photo.
For me personally, enhancing and altering my photos is part of my hobby of scrapbooking. I am doing it to make the subject more visually interesting and I am simply trying to make it a better picture which, in turn, makes my layouts more appealing.
I don’t do it on all my layouts but I find it very relaxing to sit and play with my photos. I enjoy the message that the photo brings and if I can enhance that somehow, it makes for a much better layout. It really comes down to an individual choice, but whatever we choose to do with our photos it’s all about creating a reflection of what is important to us, the memory that we are creating and the joy we get from participating in this great hobby.
Step-by-Step for Feathering a Photo
Open your photo in Photoshop Elements

Step-by-Step for Feathering a Photo
Open your photo in Photoshop Elements
Select the rectangle marquee tool
Draw around the photo leaving ¼” to ½” border around the
edge
Select
Feather
100 pixels (or more if you want a dense feathered look)
Select
Inverse
Edit
Fill Selection
I use “white” to soften the photo but you can choose any
color you like
If you are happy with the outcome, “Save” your photo.
This is the original photo

Sorry, it's a bit blurry as it was taken with a camera phone in direct sunlight.
And here is the photo with the edges feathered for a softer look on the layout.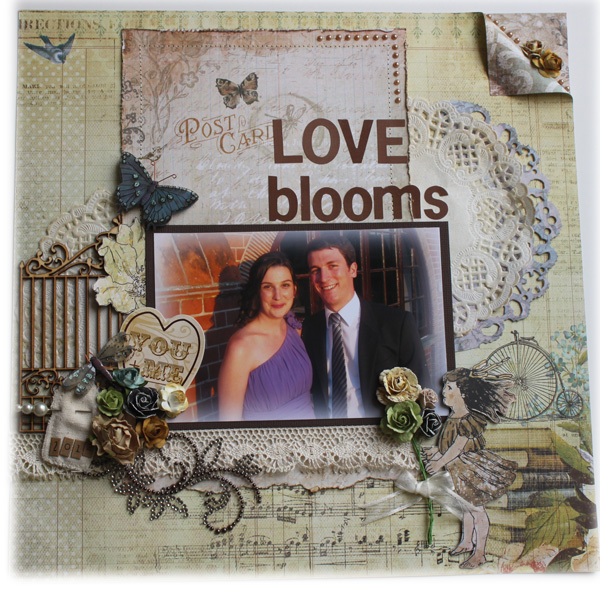
... and a few close-ups of the layout.
I used the "Nature Garden" patterned paper collection from Prima.
 I fussy cut around the girl and added a small bouquet of flowers tied with ribbon.
 A row of pearls and flowers along the folded edge of the corner.


... and a few close-ups of the layout.
I used the "Nature Garden" patterned paper collection from Prima.


Tim Holtz die "Distressed Doily" in blue and an inked white paper doily.

- Feather or soften the edges of the photo using a color that blends with the photo. You don’t want the edges to stand out and be noticeable.
- Using the Lasso tool, you can feather in different shapes around the photo, eg: oval, circle.
- Feathering creates an elegant look for a photo.
- Convert your photo to Black & White or Sepia to create a softer look.
- Mat your photo onto cardstock that matches the patterned papers you are using in your layout.
Other things to try if you don't have access to a photo editing program such as Photoshop:
- Inking the edges of your photo with ink on a foam blending tool can soften the edges of a photo.
- Tearing and edge distressing the photo can also add a different effect to the photo.
- Sanding the edges of a photo tend to soften the image.
- Mist the areas of your photo that you would like to distort with water and gently sand over top. This technique will distort the image and leave a gorgeous golden tone. This is best used on a lab-processed photo and not on photos printed at home.
- Try printing your photo onto canvas.
- Try printing your photo onto book paper or heavy textured cardstock.
- Try printing your photo onto transparency paper, letting the patterned paper or card stock show through the photo on your layout.


1 comment:
Gorgeous Val!
Post a Comment