Tuesday, September 27, 2011

From Trash to Treasure

Craft Gossip is talking about me...

Over the last 2 weeks my friend Maureen and I have been working on these very large 12 pane antique window frames.
We started by spending an entire afternoon scraping off the old caulking from each of the glass openings, removing all the old metal pins that held each pane of glass in the wood and sanding the frame down to remove most of the old cracked and peeling paint. We then painted one coat of white varnish over the frame to seal it and leave it looking a little shabby.
Then the fun began.... driving from one antique store to another in search of trinkets and treasures to display in each window opening. We spent a couple of days in search of all our treasures and we had a blast! We found old keys, door lock plates, knobs, window latches, drawer pulls, mini wreaths and locks. I think we bought enough to create another window frame!
Each pane of my frame represents things that are special in my life. Starting with my favorite saying, which I printed onto canvas and then sewed to a piece of burlap.
And a couple of sketches from my favorite book "When We Were Very Young" by A.A. Milne
A few of mine and my husband's favorite childhood photos hung on chickenwire with tiny red clothespins.
My favorite letter "K" and number "7". We had two new pieces of glass cut and I used black vinyl to create a chandelier (thanks to my friend Susan Tutt for that idea), the word "Home" and the heart that contains a favorite Helen Keller quote.
The finished product hangs in my family room.

Saturday, September 17, 2011

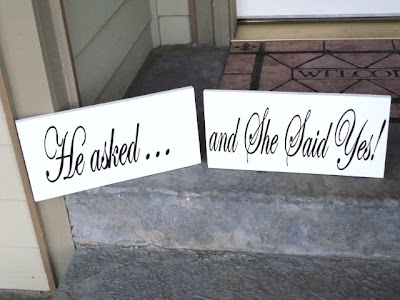
He asked... and she said YES

I've been busy this week working on a few projects and getting ready to head to Las Vegas to attend Teresa Collins Inspiration Unlimited but just had to do a quick post to share my exciting news...
I am over-the-moon excited to announce that Meagan and Jake are engaged to be married. I have been awake most nights... my head spinning with ideas for their wedding.
Here is "the proposal" photo.... taken in Cornwall, England on September 4, 2011... love how happy they both look!
And I just had to share this card that I made for the two of them.

Friday, September 9, 2011

Create a Trinket Box

My project was featured on the 7 Gypsies Blog for Facebook Friday!
Check it out at 7 Gypsies.

In just under an hour you can create a treasured trinket box from a recycled cardboard box.
I picked up a few of these boxes at my local craft store. They are relatively inexpensive and are so much fun to create with. I bought this 7"x5"x3.5" one for a couple of dollars and just had to use the new 7 Gypsies Tissue Paper on it. It was very quick to make and in just under an hour I had the perfect gift for someone special. I gathered my supplies: 7 Gypsies Tissue Tape, Gel Medium, paint brush, ruler, scissors ink, lace and flowers & trinkets for the top.
Start by cutting the tissue paper about 1/4" larger than the top and sides of the box. Spread a thin layer of the gel medium on top of the cardboard and lay the tissue paper down on top applying another layer of the gel medium on top of the paper to seal it. You have to work fairly fast as the paper starts to dry almost immediately.
Gently sand the edges of the box to remove the excess tissue paper.
Then I chose a favorite piece of patterned paper to go inside the bottom of the box. I loved this piece by GCD Studios "Vintage Audrey" as it is a replica of an old pattern piece.
Measure the sides of the box lid and cut the tissue paper double the length of each side and pleat the paper accordian style to get that crumpled look. Using the same application method, apply the paper strips to each side of the box lid.
Ink all the edges of the box and lid with Tim Holtz "Vintage Photo" distress ink.
Glue a piece of your favorite lace or trim around the edge of the box lid.
The next step is the "fun" part. Decorate the box lid with your favorite trinkets and treasures that you have in your stash. I used some Prima flowers, Kaiser Craft pearl flourishes, K&Company butterflies, buttons, twine, a metal heart locket and the 7 Gypsies Book Knob "Big Ben". Enjoy the finished product or give it away as a beautiful gift.


Friday, September 2, 2011

Quick and Easy Gift

I saw this plain wooden letter in my local craft store and immediately knew what I was going to do with it. Paint it white, cover it with patterned paper, attach some embellishments and presto.... you have a lovely gift.
Start by choosing your favorite piece of patterned paper. I am making this for my Mom's birthday so I chose paper to match her bedroom. This feminine line is by GCD. Trace the letter onto the back of the paper and cut it out.
Spread some plain old white glue over the letter with a paintbrush. Lay the paper overtop and use a brayer to roll out the bubbles.
Apply a light layer of regular gel medium (matte finish) overtop of the papered letter to protect the surface, let dry and sand the edges.
Add your favorite embellishments and enjoy the finished product. This was a very quick project, taking less than an hour to make.